Kubernetes is the most powerful orchestration layer for containers, that is a fact. but is it just for containers?

“Kubernetes a platform to build platforms”, not just running workloads. You can introduce to kubernetes new objects (CRD), declare them with a manifest, control them with Kubernetes controllers, expose them with Kubernetes services, and connect them with the same network construct of kubernetes.
So, if you combine the statements above, why not use Kubernetes to manage VM’s as well?
The Answer, vSphere with Tanzu, VM service!

If you want to learn more about vSphere with Tanzu and the Kubernetes services integrated into vSphere, you can read about it here. Once you have that Kubernetes service builds in your hypervisor cluster, or should I say Supervisor Cluster, now you can extend the workloads that will be managed and run on that platform. When we announced vSphere with Tanzu, we exposed different services that can run and leverage the Kubernetes service directly. On ESXi, the main one is Tanzu Kubernetes Grid that allows you to provision and manage Kubernetes clusters with ClusterAPI on top of the Supervisor Cluster. Other services like Harbor and Data Persistence Platform, which run as vSphere Pods, allow you to run applications directly on the Supervisor Cluster.
As from vSphere 7 U2a, we added a new VM service that allows you to manage VMs with native Kubernetes API on top of the Supervisor Cluster. Just like any other service we enabled, once you configure the VM service on a supervisor namespace, you will be able to declare a VM object that will be post configured according to a configmap object and exposed with a network service object. Everything Kubernetes!

The service allows you to extend the DevOps experience and get a single API to manage any workload on vSphere with the Kubernetes Supervisor Cluster.
A quick demo of the service and capabilities:
Lets digg deep to the service configuration:
VM service configuration – the virtual infrastructure admin must pre-configure several parameters to set the ground for VM to be provisioned. Those parameters are part of the resource control and management and without that configuration, we wouldn’t be able to provision VMs. Let’s go over those parameters:
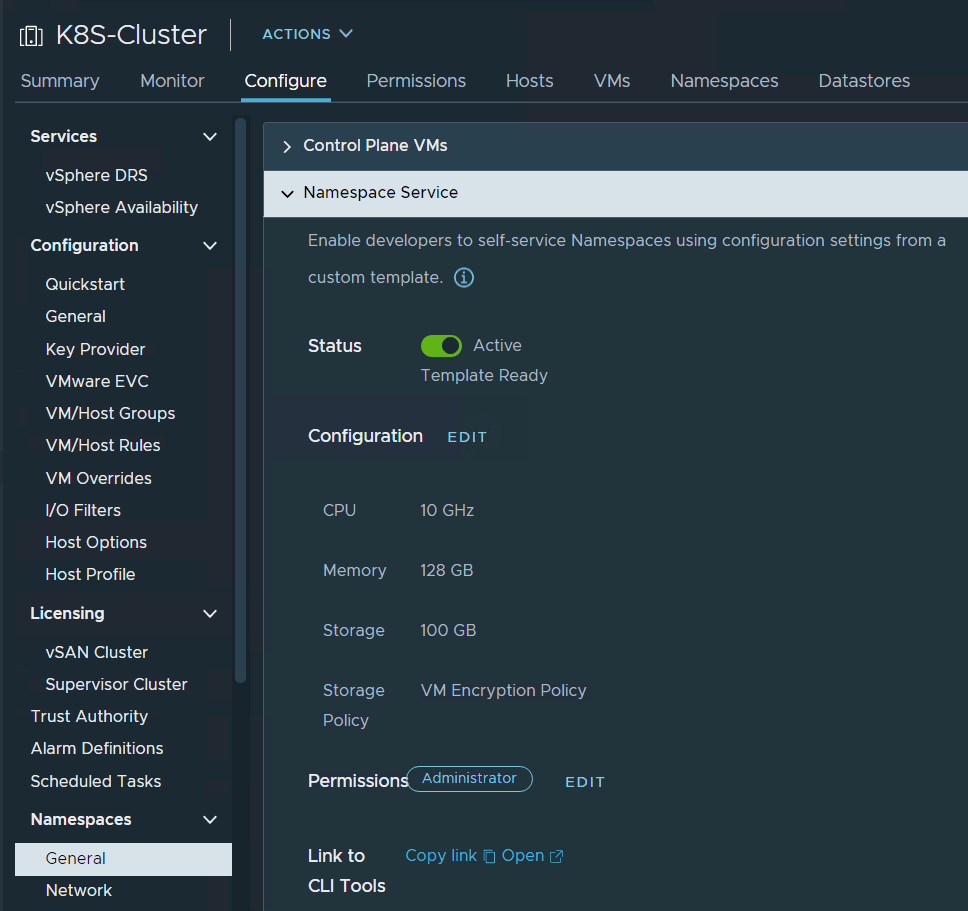
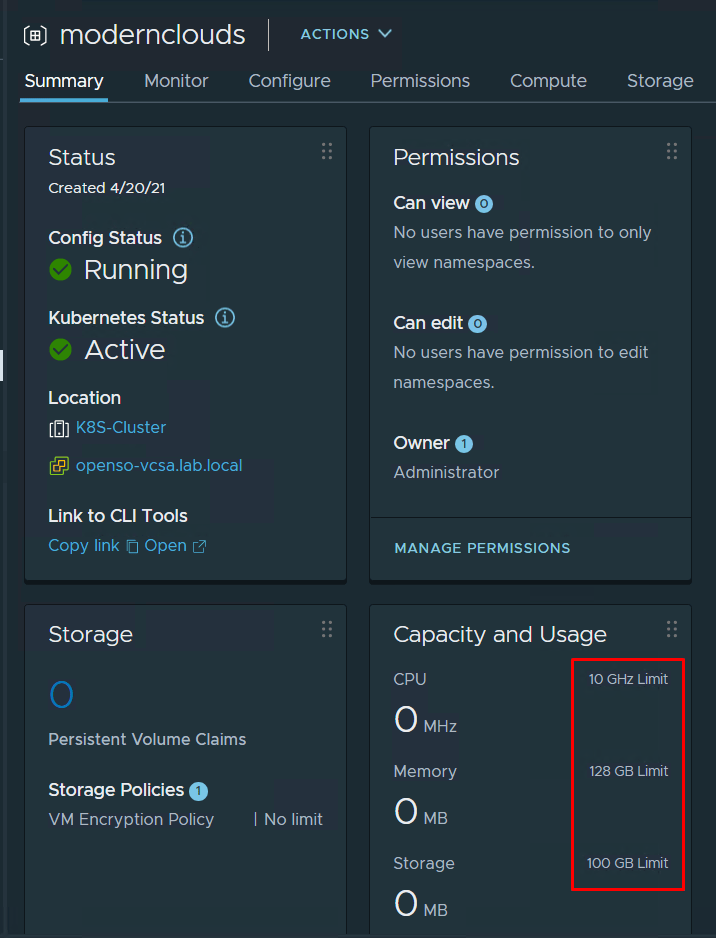
- Namespace service – with namespace service, we can enable specific SSO users to create vSphere namespaces with Kubernetes API. We must set resources boundaries to prevent so that namespace workloads can’t expand and consume all of the vSphere cluster resources. Those resource boundaries will be applied as quota policy on the new namespace automatically.

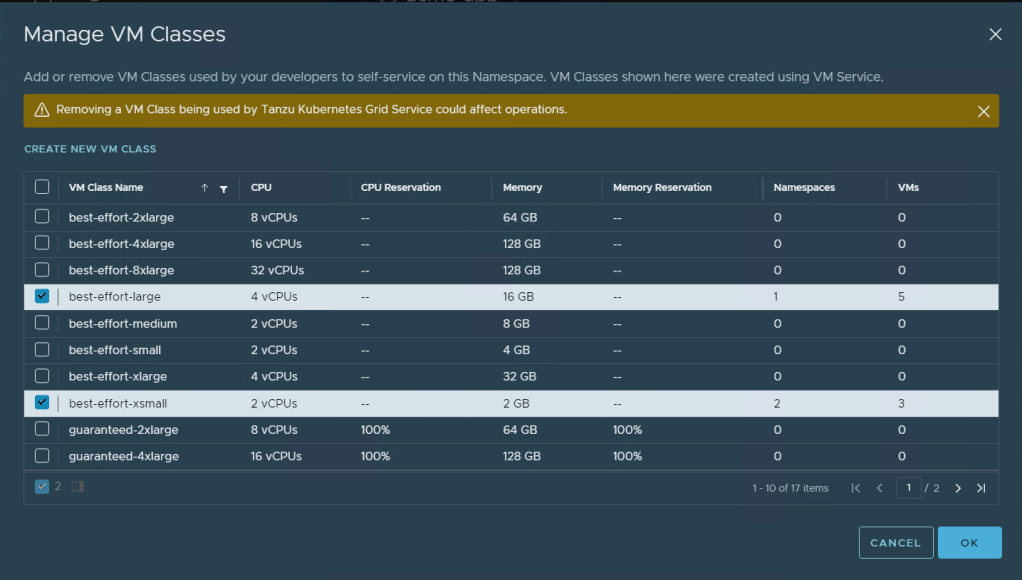
2. Machine class – Machine class is the size of the VM that will be created as part of the VM service. The configuration should state which machine classes the DevOps engineer can state in the manifest file.
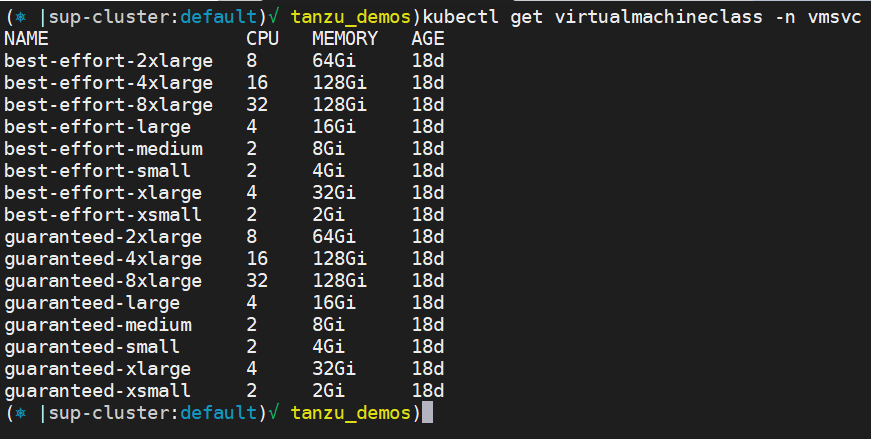
After bounding the machine classes to the Namespace, we can query Kubernetes for “VirtualMachineClass” and “VirtualMachineClassBindings” objects to see the classes that we can use as part of our declaration file in a namespace context:

3. Content library – The VM image files that will be the base for the VM need to be stored in a content library and bound into the namespace. Once configured, the DevOps engineer can state the OVA image he wants in the manifest of the VM object.
** The first version of the VM service will be shipphed with CentOS support followed by Ubuntu and other OVA **

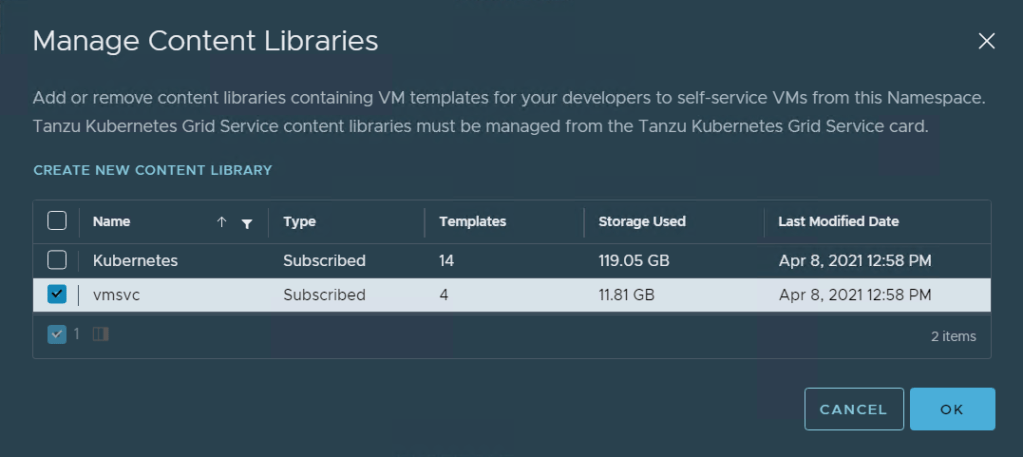
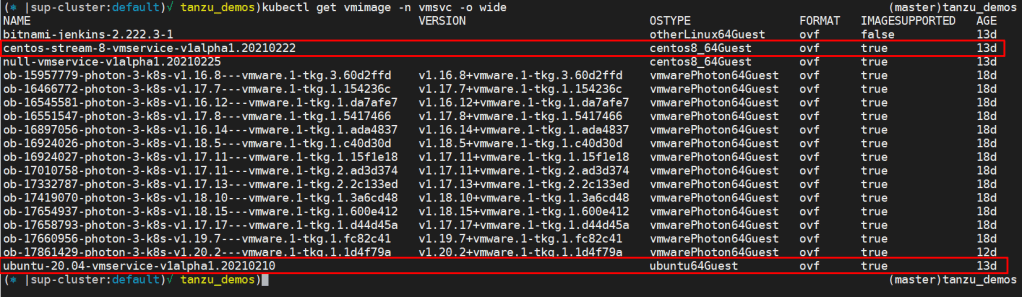
After bounding the content library to the Namespace, we can query Kubernetes for “ContentSourceBindings” and “VM Image” objects to see the content library and the OVA we can use as part of our declaration file in vmsvc namespace context:

4. Configure VM manifest – Now, the DevOps engineer can create declaration files to provision and manage the VM’s with the Kubernetes API. Let’s go over a simple example of a YAML for VM declaration:
apiVersion: vmoperator.vmware.com/v1alpha1
kind: VirtualMachine
metadata:
  labels:
    my-selector: ubuntu-services
  name: vmsvc-ubuntu-01
spec:
  networkInterfaces:
  - networkName: ""
    networkType: nsx-t
  className: best-effort-xsmall
  imageName: ubuntu-20.04-vmservice-v1alpha1.20210210.enabled
  powerState: poweredOn
  storageClass: k8s-storage-policy
  vmMetadata:
    configMapName: vmsvc-ubuntu-cm-01
    transport: OvfEnv
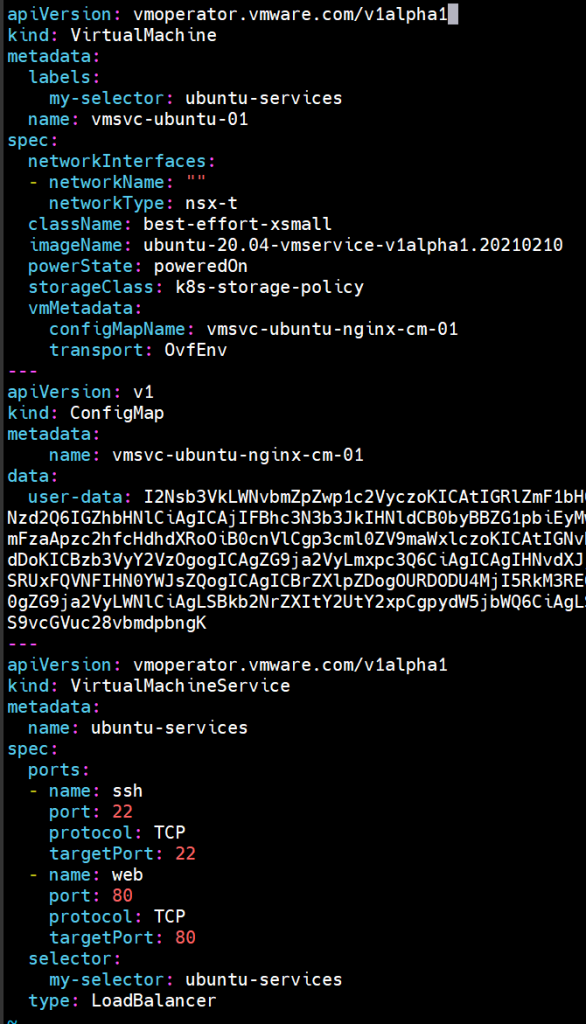
We declare a “VirtualMachine ” type of object that’s the CRD for a virtual machine in the Supervisor Cluster. In the manifest file we also declare the network type, in this case NSX, the class and the image of the VM and the storage policy that indicates the datastore for the VM that will be provisioned.
The VM will be cloned from the ova as a unconfigured VM. We need to configure the VM to suit our needs of the specific app it is part of. For that, we use cloud-init post configuration in Linux OS. In the file below, configuring the cloud-init steps in another YAML file:
#cloud-config
users:
  - default
  - name: vmware
    sudo: ALL=(ALL) NOPASSWD:ALL
    lock_passwd: false
    passwd: '--------------------'
    shell: /bin/bash
ssh_pwauth: true

write_files:
  - content: |
      VMSVC Says Hello World
    path: /home/vmware/helloworld

apt:
  sources:
    docker.list:
      source: deb [arch=amd64] https://download.docker.com/linux/ubuntu $RELEASE stable
      keyid: 9DC858229FC7DD38854AE2D88D81803C0EBFCD88

package_update: true

packages:
  - docker-ce
  - docker-ce-cli

runcmd:
  - sudo docker run --name nginx -p 80:80 -d harbor.tanzuworld.com/openso/nginx
In the post configuration file, we can see a user and password configuration, print a new test file in a specific location. In this use case, as part of the demo video, I have installed docker on that Ubuntu, and I’m running a simple nginx web page exposing the container with port 80
To integrate that configuration into our VM service imprinting the file out in Base64 format and then incorporate that into a new config map object
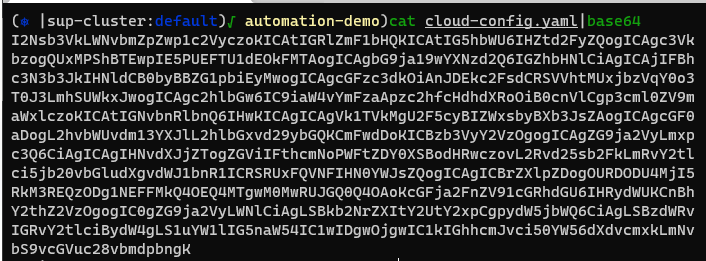
apiVersion: v1
kind: ConfigMap
metadata:
    name: vmsvc-ubuntu-cm-01
    namespace: vm-operator
data:
  user-data: I2Nsb3VkLWNvbmZpZwp1c2VyczoKICAtIGRlZmF1bHQKICAtIG5hbWU6IHZt
I’m referring to this config file in the VM manifest as OvfEnv under VM data, as you can see in the code below (you can see it in the VM manifest up as well)
vmMetadata:
  configMapName: vmsvc-ubuntu-cm-01
  transport: OvfEnv
Now that we have the VM manifest and the CM manifest, we need to expose the VM somehow, and for that, we will declare a new object (CRD) from kind VirtualMachineService who will expose a service type LoadBalancer with the ports and configurations we need
apiVersion: vmoperator.vmware.com/v1alpha1
kind: VirtualMachineService
metadata:
  name: ubuntu-services
spec:
  ports:
  - name: ssh
    port: 22
    protocol: TCP
    targetPort: 22
  - name: web
    port: 80
    protocol: TCP
    targetPort: 80
  selector:
    my-selector: ubuntu-services
  type: LoadBalancer
That service will expose the nginx web page from the container in port 80 and allow us to connect with ssh directly to the machine to configure or change anything else.
5. Deploy VM with Kubectl – Now to deploy the VM using Kubectl, and the manifests declared below:

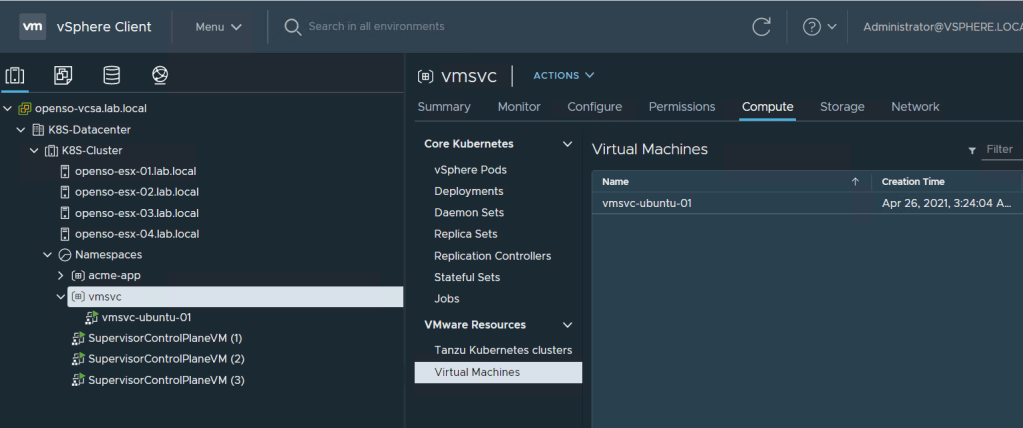
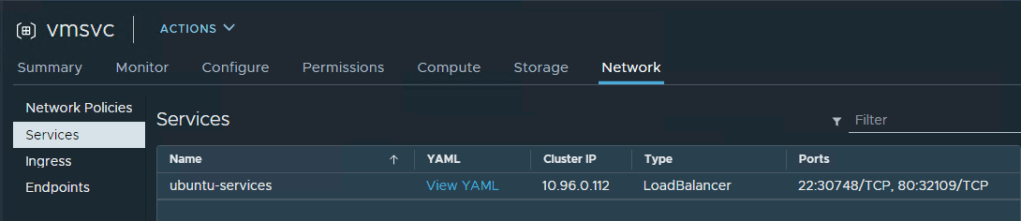
The Kubectl command will create three Kubernetes objects: VirtualMachine, Configmap and VirtualMachineService. in the vCenter side we can see the new VM object under the namespace configuration <> compute tab in the virtual machine section. in the same way we can see the new network service under network section.
On the Kubernetes side we can query for VM, Service and endpoints for that load balancer service to check that everything is configured correctly:
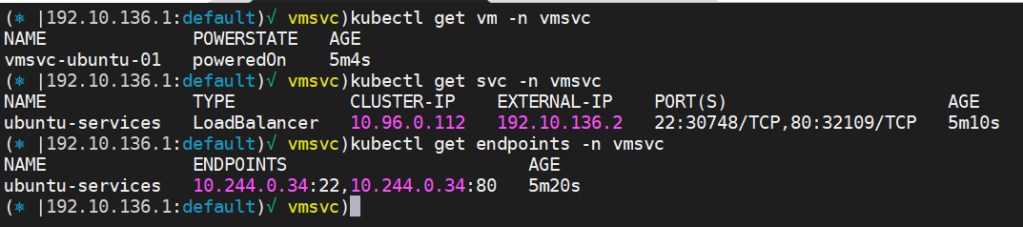
We exposed port 22 for SSH and port 80 for web lets connect to the VM and brows the load blancer IP:
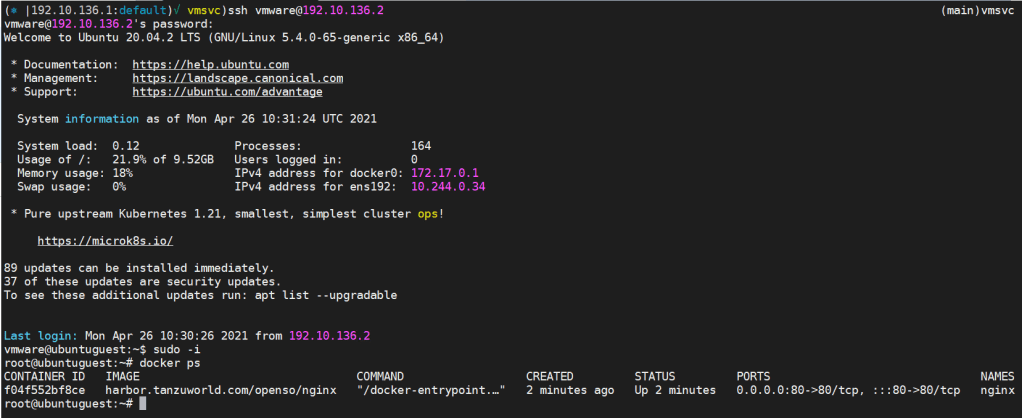
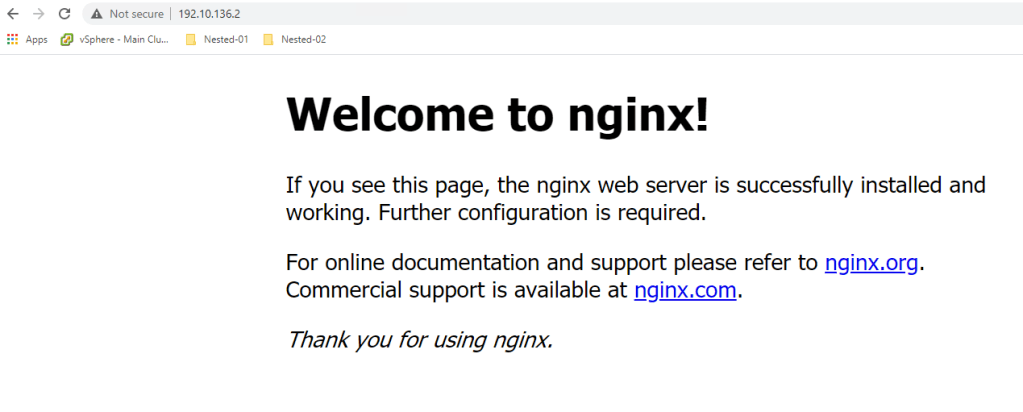
By connecting to the machine with the username and password and browsing the Nginx web page, we know that the cloud-init phase went well, and everything is installed and configured according to what we declared in the cloud-config YAML file.
All the configuration files and YAML file are consolidated in my Git repo: https://github.com/0pens0/vmsvc_demos.git
To summarize, I believe that the future of vSphere is Kubernetes management and control of any workload. It’s a vast frog leap forward in having a single, open, standard de-facto infrastructure orchestration API layer that can be consumed by automation and orchestration tools like vRealize Automation and others to automate everything, including VM’s.

2 thoughts on “The future of VM’s is Kubernetes”